Git Server: Gitosis and Cygwin on Windows
Published on
Git is arguably the latest and greatest SCM tool available - my latest tool of choice in place of the old favourite Subversion, and as such have decided to move to using it for my personal projects. In addition, we have decided to use it at work, where we run operate using a mainly-Windows environent. This lead me on to setting up a Git server on Windows. This was achieved using Cygwin and plain old SSH/Git. This serves us fine for our needs, but a comment on twitter got me thinking - can Gitosis be used under Cygwin for a slicker experience. The answer is yes, and this post will explain how.
Assumptions
This post assumes the reader is familiar with git and is comfortable with the command line (in particular bash). It also makes the assumption that the user is familiar with OpenSSH and its public/private key system. This procedure was tested using a Windows Server 2003 VM, but I foresee little difficulty in following the same procedure in other Windows versions. Do comment if this is not the case. At the time of writing, Cygwin 1.5.25-15 was the latest version.
Gitosis?
Gitosis is a tool written in python designed to make hosting git repositories easier and more secure. Instead of requiring user acounts on the server machine with shell access, it operates under a single user account and uses SSH keys to differentiate users, and grants/denies access to a set of repositories based upon a configuration file.
It was primarily designed for use on Unix-like operating systems (and works very well on my Ubuntu-based server) but as yet I have seen very little mention of it used on Windows.
Garry Dolley has a very good tutorial for setting up gitosis on a Ubuntu machine on scie.nti.st and it should apply with little modification to most other linux/unix-like operating systems as well. It was this tutorial which served as reference during my gitosis exploits.
Installing Cygwin
Cygwin can be obtained from their website and consists of a setup application which requires an internet connection in order to download the packages for installation. Installing Cygwin is a fairly straightforward affair, with a fairly standard graphical setup wizard. Choose the 'Install from Internet' method and install with all the defaults, making sure Cygwin is installed for all users as the SSH service will not run as your user account. Pick any download mirror which works (sometimes not all do), and you will be given a large list of packages.
In order to install all the tools needed, select the following packages by clicking on the word 'Skip' to change it to the latest version number. Further clicks will cycle through previous versions and back to 'Skip' again. Its probably best to stick with all the latest versions.
- git (in the 'Devel' category)
- openssh (in the 'Net' category)
- python (in the 'Python' category)
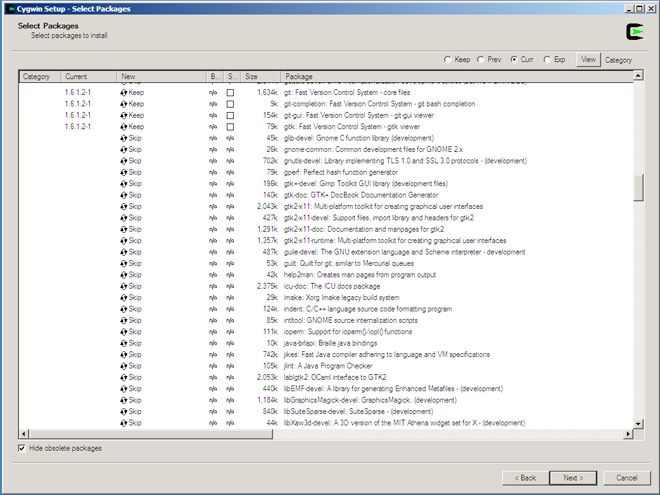
This should be all that is required on top of the defaults. Of course, there are many more and feel free to choose those which apply to you. You can come back later and install/remove additional packages if the need arises.
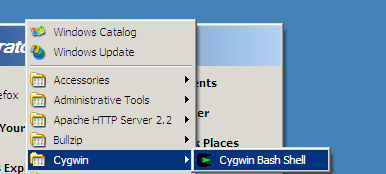
Once the installation completes, you should have an entry in the Start menu and/or on the desktop for the Cygwin Bash Shell.
Setting up SSH
Now that Cygwin is installed, we can use it to set up SSH as a service. This will be what we use to pull from and push to our git repositories later.
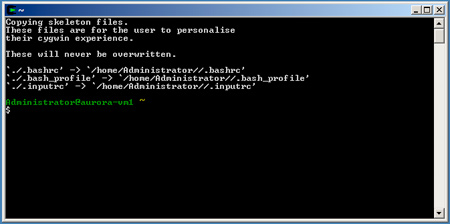
Fire up the newly installed git bash shell. If you are used to linux or unix, this will be a familiar sight - the bash shell.
Before setting the SSH service up, we must make a tweak to some privileges. Apparently this is a problem with newer Cygwin releases (from here). Run the following commands:
chmod +r /etc/passwd
chmod u+w /etc/passwd
chmod +r /etc/group
chmod 755 /var
In order to get the SSH service set up, type ssh-host-config, and answer yes to the question "Should privilege separation be used?" In addition, answer yes when asked whether a new local account called 'sshd' should be created, and to whether sshd should be installed as a service. When prompted for the value of the 'CYGWIN' environment variable, accept the default by hitting enter, and answer no to whether you wish to use a different username to the default for the account for running the service, and then answer yes to whether the user account 'cyg_server' should be created. You will be asked for a password for the new user - enter your choice of password here. This is just to protect the user account from unauthorised access, since it will have local administrator privileges. If all goes well, your user account will be created and the service will be set up.
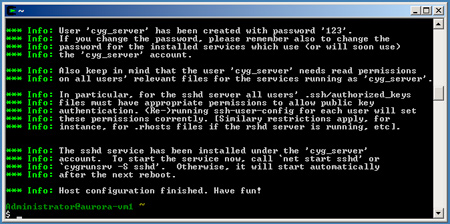
As stated in the success message, we can now crack on by starting the SSH service Cygwin has installed with us. Run net start sshd to get it going.
Installing Python Setuptools
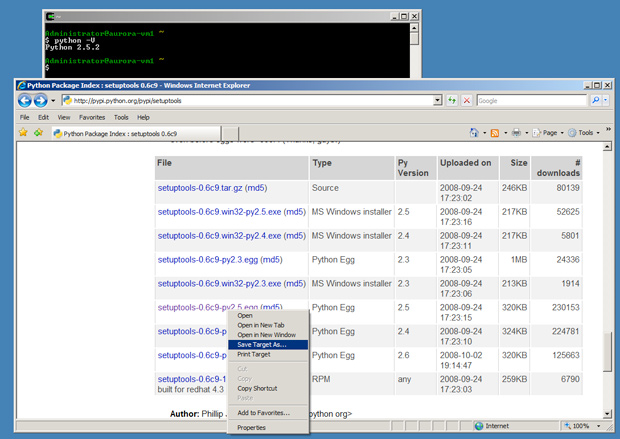
Before installing gitosis, we will need to install python setuptools. This is what gitosis uses to install itself. The latest version of setuptools can be found at the Python Package Index - scroll down near the bottom of the page for the files. Since we are installing in Cygwin, we want the .egg version matching the python version installed by Cygwin. For me, it was python 2.5 and the .egg file I needed was called setuptools-0.6c9-py2.5.egg. To check your python version, run python -V in the bash shell. To download the file, right click and save the target since many browsers try to interpret .egg files as text. I placed the file in root of the C drive for ease of access from the Cygwin Bash shell.
Once the download is finished, we can run the .egg file as if it were a shell script or executable file. Execute the following command (changing the path if you saved the file elsewhere or have a different version):
/cygdrive/c/setuptools-0.6c9-py2.5.egg
This will whizz through quickly and install setuptools for you. Now we're ready for installing gitosis.
Installing Gitosis
Gitosis is installed by cloning its git repository. In your Cygwin Bash window, create a convenient directory and change into it. You can then clone the gitosis repository. Since gitosis is small and lightweight, this will only take moments.
mkdir sources && cd sources
git clone git://eagain.net/gitosis.git
Once the clone is complete, install gitosis with the following commands:
cd gitosis
python setup.py install
A bunch of output will fly past and if all went well, gitosis is now installed.

In addition, I encountered permissions problems during my installation, where the git user could not read setuptools and/or gitosis. To save yourself a lot of pain and headaches later, run the following command to allow all users to read all the python code we have just installed: chmod +r /usr/lib/python2.5/ -R
Set It All Up...
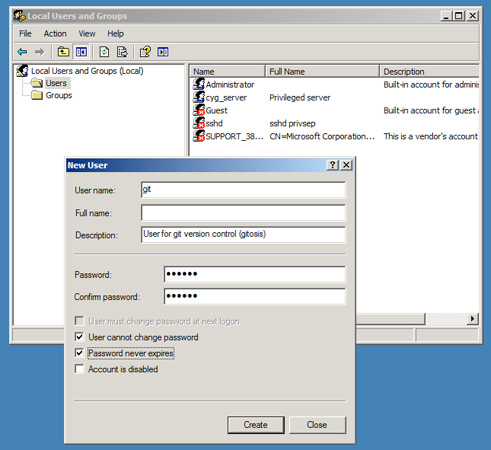
The first thing to do now gitosis is installed is to create a user for it. Traditionally this is called 'git', although you can call it whatever you want. Since I am on Windows Server 2003, I cracked open lusrmgr.msc and created my user. Give it any password you like. I also set it to never require or allow a password change.
We will also need to enable the git user for use from within cygwin. Run this command in your cygwin bash window: mkpasswd -l -u git >> /etc/passwd
Before continuing, you will need a public SSH key. If you do not have one on your local machine (not the server), generate one. On OSX, Linux, Cygwin and other unix-like OSs, this can be achieved using the ssh-keygen command. If you need more help, see the github guide on providing your key.
Once you have located or generated your public key (make sure its the public one not the private!), copy it over to the server and place it in cygwin's /tmp folder. This is the C:\cygwin\tmp folder. Place the key in there and go back to your cygwin bash window. Allow all users to read the key (in my case, it is called id_rsa.pub) using the following command: chmod 755 /tmp/id_rsa.pub
Now it is time to initialise gitosis in the home directory of the git user we created earlier. Now we need to log in as the git user and initialise gitosis using the key we have copied over. The easiest way to log in as the git user is to use the runas command within Windows to launch a new cygwin window running as the git user.
runas /user:git C:/cygwin/cygwin.bat
A new cygwin bash window will open logged in as the new git user. Within this window, we initialise gitosis using the following command, remembering to substitute your key's filename if it is different:
gitosis-init < /tmp/id_rsa.pub
You should get the following feedback to say it was successful:
Initialized empty Git repository in /home/git/repositories/gitosis-admin.git/
Reinitialized existing Git repository in /home/git/repositories/gitosis-admin.git/
Back in your Administrator user bash window, ensure everyone has permissions on the post-update hook gitosis provides. Apparently sometimes this does not get set correctly (and its always best to avoid headaches like this later).
chmod 755 /home/git/repositories/gitosis-admin.git/hooks/post-update
Using Gitosis
Now that we have gitosis installed and ready to go, we do not need to work on the server anymore. Go back to your own local machine (where your SSH key came from earlier) and clone the gitosis administration repository. This is a particularly cool aspect of gitosis - you manage your gitosis configuration using its own git repository. How recursive!
Before we clone the repository, try a plain SSH connection to the server. This is because we need to accept the server's key first and this only needs to be done once: ssh git@your-server. Accept the key and disregard the error you will receive. That's all you needed. Now the admin repository can be cloned.
git clone git@your-server:gitosis-admin.git
Inside the cloned repository there is a folder named keydir and a config file named gitosis.conf. Adding a new user is as simple as adding their key to the keydir folder. You will also notice that your own key which we initialised gitosis with earlier has automatically been added. Also, the filename will have changed to match the key comment (often this is in the form of user@hostname). To add a new repository, crack open the config file in your favourite text editor. You will see the following:
[group gitosis-admin]
writable = gitosis-admin
members = me@myhost
I added a new group and left the gitosis-admin one intact. A group is a nice easy way of dividing up which users can read/write to what repositories.
[group me-and-my-friends]
members = me@myhost
writable = cool-new-project
More than one user and/or repository can be added to any group section, and there may be multiple group sections. This is particularly useful if you have a team and wish to be broken down into smaller subteams. A quick example:
[group team1]
members = john bob sarah
writable = project1 project2

[group team2]
members = bob tina tom
writable = project3 project 4
Once the keys and config file are added or updated, commit and push the repository back to the server. Gitosis will update its configuration automatically.
The new repositories can be created locally using git init. You can then go about adding all your new files in the usual way and push the repository to the server after adding a new remote (normally called 'origin'):
git remote add origin git@myserver:cool-new-project.git
git push origin master:refs/heads/master
This will create the repository on the server at the given URL and make it available to all those for whom you granted access. Be sure to use the same repository name in the gitosis config file as you do on the URL (with '.git' appended).
There is a lot more which can be done using gitosis, such as allowing repositories to be exposed via the git:// protocol and much more. A lot of this stuff I haven't tried yet since its functionality I haven't needed. See the gitosis readme and example.conf files for more information.
If you notice any errors or omissions in this post, please do comment or message me on twitter and I will try to find the answer or update the post as necessary.